Mod Description
In the Roadster you can have additional instruments fitted.Mod Details
PremiumYes Difficulty


 Mod ID472
CreditEvil/HoagieKat
Cost£ï¿½120+
For
 Linkhttps://dev.evilution.co.uk/mod/roadster-dash-pod-wiring1.htm Copy to Clipboard
Many thanks to Gavin from OnSmart for supplying the Roadster and parts for this how2.
Options
Your first choice is the design, you can choose from:
White dials
Black dials SQ0015568V003C96A0
Brabus dials
Any design will work with your Roadster but it makes sense to copy the speedo colour.
The additional instruments retail at £120.82 + VAT, Brabus ones cost more.
Extra Wiring
On the 2003 and early 2004 manufactured Roadsters, the wiring for these pods just wasn’t fitted as standard. Don’t be too concerned as adding it is quite easy.
The extra wiring connection is available from smart, the part number is SQ0017076V00100000 and they retail at £31.09 + VAT.
How Do I Know If I Need It?
Gavin came up with a good suggestion if you don’t have the automatic rain sensor fitted. Swing the SAM unit down and unclip plug 9, slide out the grey plug and find connection 14. If you have no blue or violet wire coming from pin 14, you will need the extra wiring.
I Have Found A Wire In Pin 14
Well the good news is that if you don’t have the automatic wiper and headlight sensor, you have the wiring suitable for the additional instuments, the bad news is that you now have to find the plug. Unfortunately it’s not usually that easy.
More often than not the plug is situated somewhere behind the centre console. Removing the radio, lower switch panel and accessory drawers can help you find it.
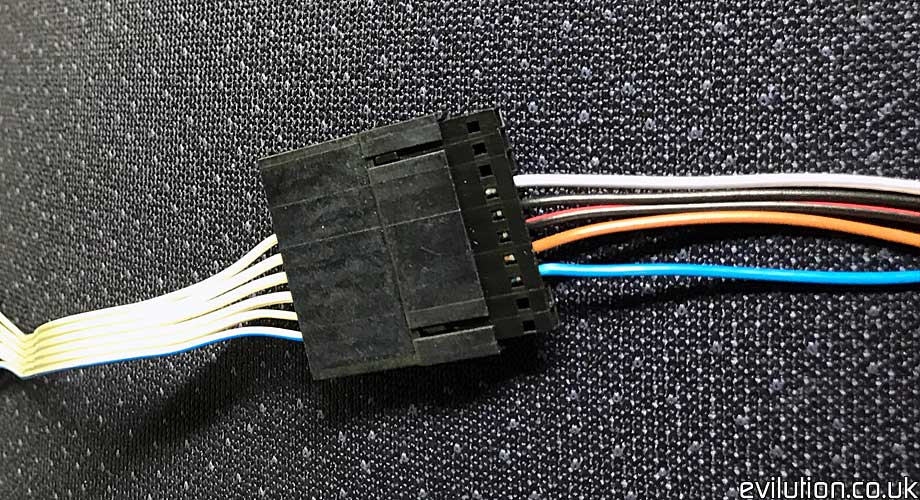
You are looking for a black flat connector with 10 pins. It will have wires coming from pin:
1 = Green/Blue
2 = N/C
3 = Violet
4 = Brown
5 = Red/White
6 = Blue
7 = Brown/White
8 = N/C
9 = N/C
10 = N/C
I Do Have The Automatic Wiper & Headlight Sensor
But you still can’t find the connector huh! Annoying. You will have to fit the replacement loom and splice the SAM cable into the existing wire found at Plug 9 connection 14.
It would seem as though the replacement wiring loom has different wire colours which makes things even more complicated.

3 = Blue
4 = Brown/Yellow
5 = Black/Red
6 = Black/White
7 = White
Or
3 = Blue
4 = Brown
5 = Black/Red
6 = Black
7 = Grey


