Mod Description
Remove the stereo to fit an mp3 lead for example.Mod Details
PremiumNo Difficulty


 Mod ID645
CreditSam T
Cost££0
For
 Linkhttps://dev.evilution.co.uk/mod/454-stereo-removal.htm Copy to Clipboard
Forfour Radio Removal
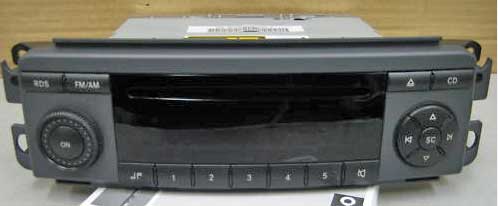
Radio 5
Pull the heater dial switches off, this requires some force. Remove the rings, this is a twist anti-clockwise action. You must take care as the three lugs that hold these can break.

If you are having problems twisting the rings, hold the silver bezel in place with your hand and pop the black centre disc out by levering it with a screwdriver. Once the centres have been popped out the bezels are a lot easier to turn as they can deform to get over the internal locking clip.
Under the centre cowl are two Torx screws, undo these then pull the cowl towards you to remove it. There are four clips where they attach, removal will reveal the radio mounting points.

There are eight Torx screws to remove to be able to release the radio. Four are around the radio, two hold the cubbyhole and a further two hold the button bank. The button bank holds the cubbyhole and the cubbyhole holds the radio.

Pull the radio forwards and disconnect the 2 connections from the area indicated below. On the other side is the aerial connection which just pulls out.

You will now be able to pull the radio out of the dashboard.
Radio 6
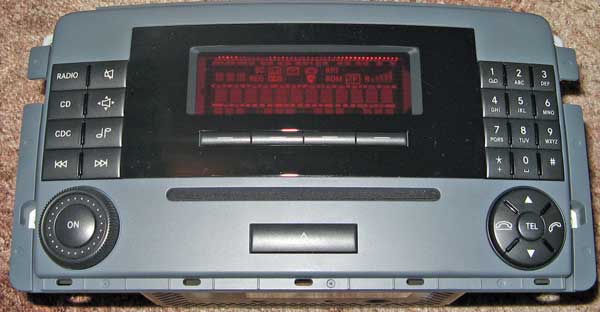
The Radio 6 removal is exactly the same as above but the double DIN size of the stereo means that you won’t have a cubbyhole. Instead, once you have removed all the screws and the button bank, the stereo will be able to be removed and disconnected.

The Radio 6 has different connections on the rear.

All of the connections are held in with a frame. It’s known as a MOST Quadlock connector. To disconnect it, there is a lever that is pressed and pulled down to unclip it. The MP3 lead goes into the upper right connector in the photo above. Once in place, thread the lead through the frame and lock the quadlock connector back in place.
Activating The MP3 Input
Radio 5

1. With the car turned off (so the radio is off), turn the radio ON.
2. Whilst the display shows the word “SMART”, press and hold the “notes (dP)” and “4” buttons together. The radio will come on, then go back to showing “SMART”. You are now in the diagnostic menu.
3. Press the UP arrow key on the right side circle of buttons until “EXT OFF” appears.
4. Turn the volume dial on the left until the option changes to “EXT AUX”.
5. Then keep pressing arrow up until “END” appears.
6. Power off radio.
7. Power back on. You can now select “AUX” using the “CD” button in the top right hand corner.
Radio 6

Press and hold the button labeled CDC (3rd button down on the left) for a couple of seconds until AUX INPUT ACTIVE is seen in the stereo’s display. The lead is now activated.


